How do I install my eSIM on iPhone?
Make sure you're connected to Wi-Fi before you begin. You'll need your QR code open and ready - either from your Gohub confirmation email or from the app under your order details.
Method 1: One-tap installation (Recommended, iOS 17+ only)
The fastest way to install. No need to go into Settings manually.
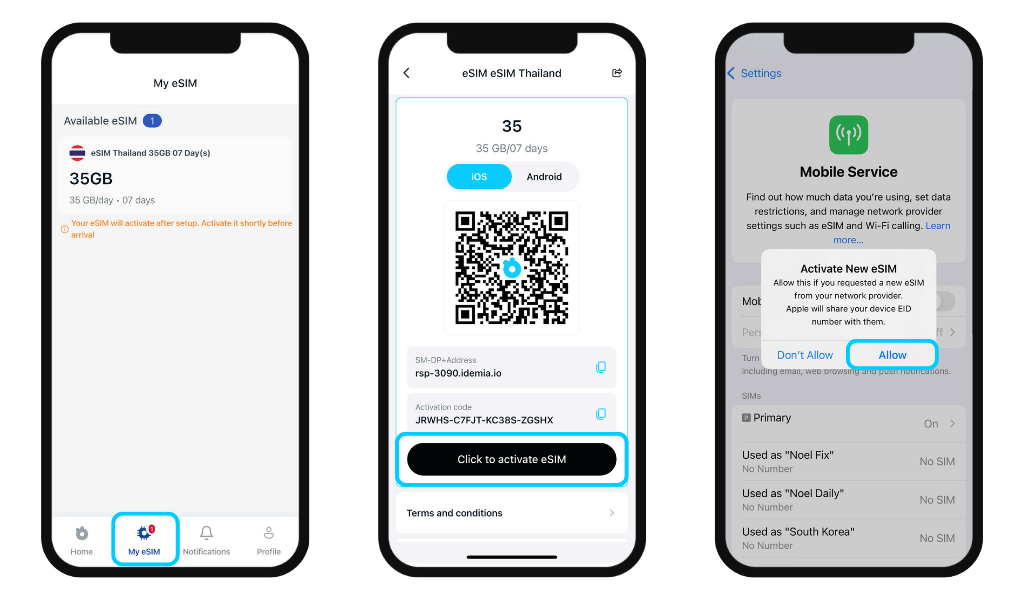
From the Gohub app:
- Open the app and go to the My eSIM tab
- Your order appears automatically - tap "Click to activate eSIM"
- Your phone jumps directly to the Mobile Service screen in Settings
- Tap Allow when prompted with "Activate New eSIM"
- Follow the remaining on-screen steps to complete setup
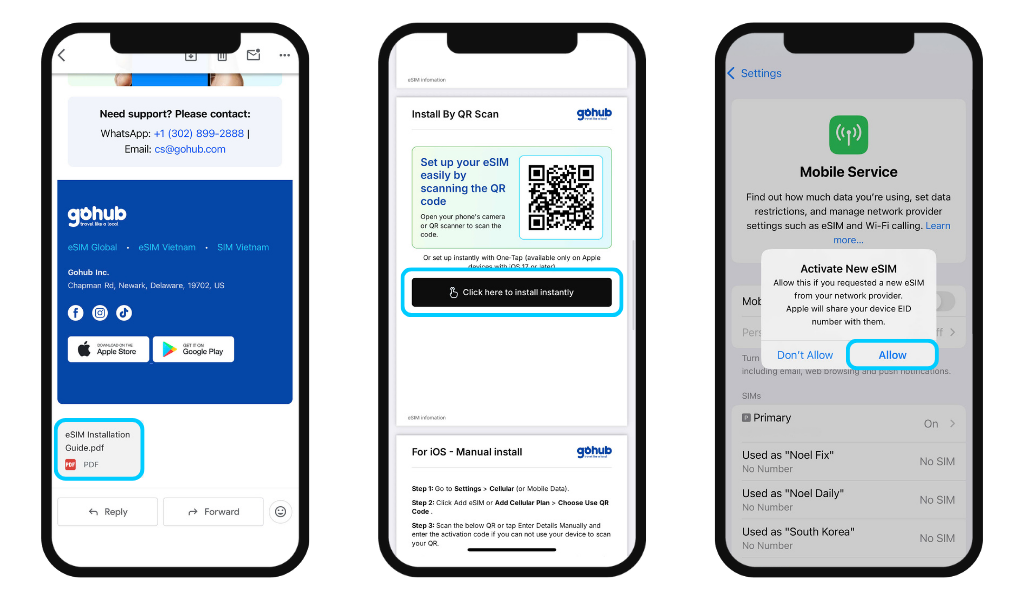
From your confirmation email:
- Open the PDF attachment in your Gohub confirmation email
- Scroll to the eSIM section, you'll see your QR code and a black button that says "Click here to install instantly"
- Tap that button, your phone jumps directly to the Mobile Service screen in Settings
- Tap Allow when prompted → follow the remaining steps to complete setup
⚠️ This method is only available on Apple devices running iOS 17 or later. If you're on an older iOS version, use Method 2 (scan QR code) instead.
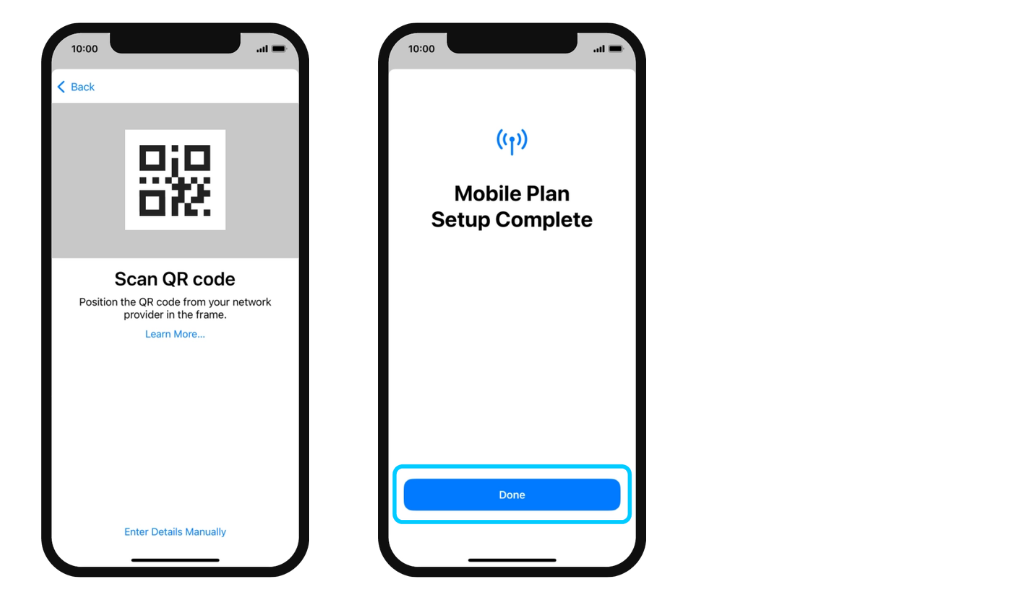
Method 2: Scan the QR code
- Go to Settings → Mobile Service
- Tap Add eSIM or Add Cellular Plan
- Tap Use QR Code

- Scan the QR code directly - or tap Open Photos to upload a screenshot from your camera roll (iOS 17 and above only)
- Tap Continue until installation is complete → tap Done
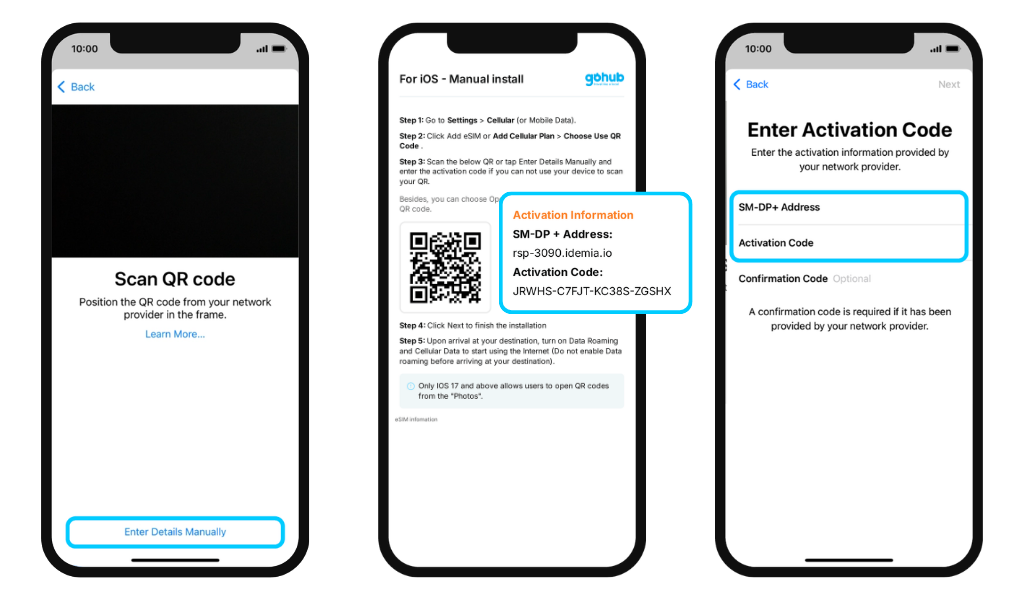
Method 3: Enter details manually (if QR scan doesn't work)
- On the QR scan screen, tap Enter Details Manually at the bottom
- Open the Gohub app or confirmation email and copy the activation details
- Enter the SM-DP+ Address and Activation Code into the fields shown
- Leave the Confirmation Code field blank
- Tap Continue → tap Continue again → tap Done
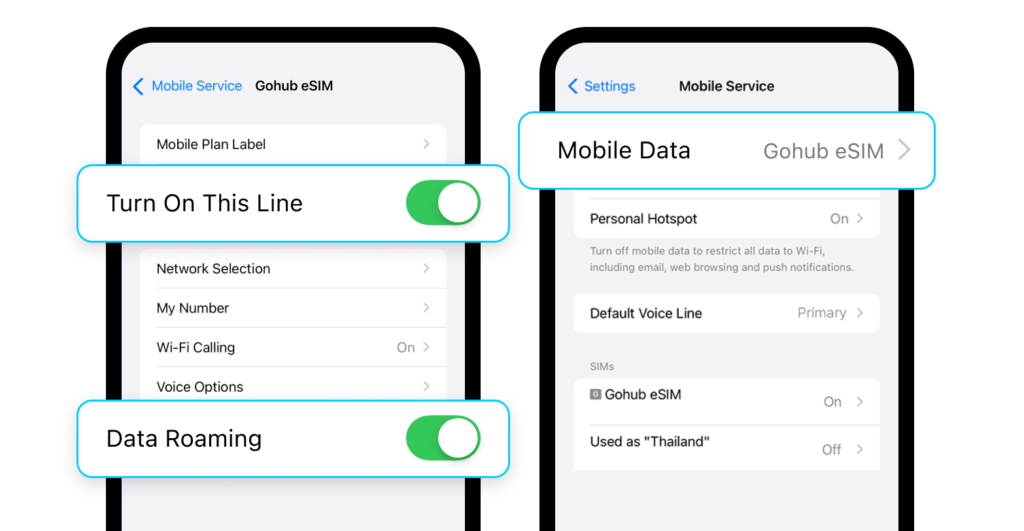
After installation: Finish your setup
- Mobile Plan Labels: Rename your eSIM (e.g. "Gohub - Japan")
- Default Line: Choose which SIM handles calls and messages
- iMessage & FaceTime: Select your preferred line
- Mobile Data: Select your Gohub eSIM as the data source, and turn off Allow Mobile Data Switching to avoid accidentally using your primary SIM's data
✅ Your eSIM is now installed and ready.
The only thing left to do is turn on Data Roaming and Mobile Data when you land to start using the internet. Make sure to enable it only after you arrive at your destination. Turning it on early may cause your plan's validity to start counting down before your trip begins.